
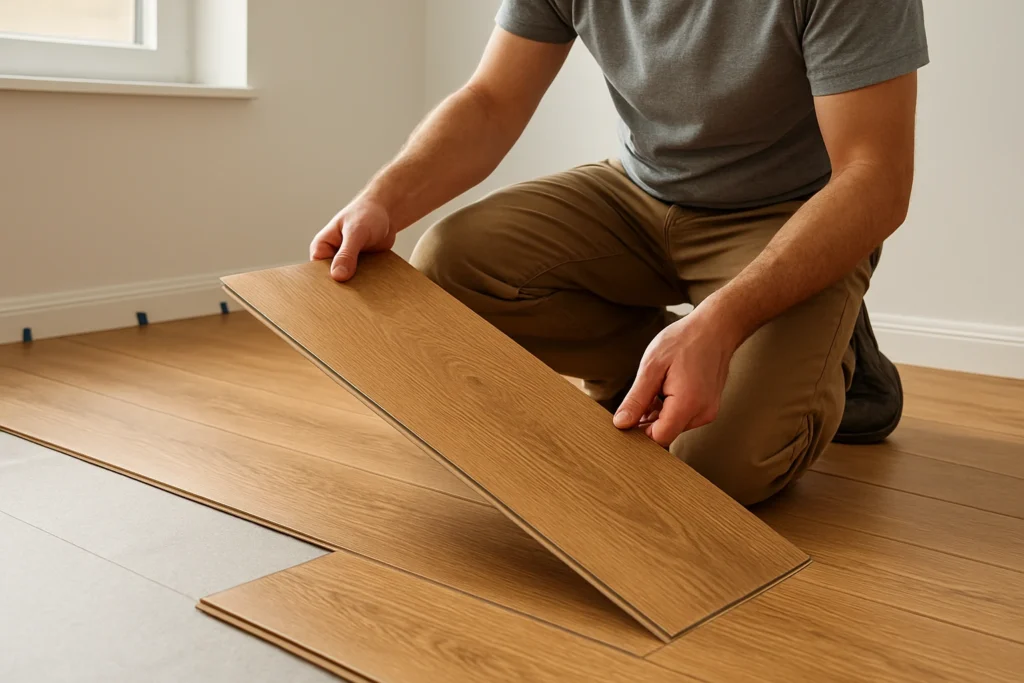
To install laminate flooring, prepare a dry, flat subfloor, fit the approved underlay, and click the planks together as a floating floor. Plan the rows before cutting, stagger the end joints, and leave the expansion gaps required by the flooring manufacturer around walls and other fixed objects. Finish with suitable doorway trims and skirting without fixing through the laminate, so the floor can move as room conditions change.
Check Whether Laminate Suits Your Room
Laminate flooring suits many dry indoor rooms, but the product must be approved for the room and the surface beneath it. Most click-lock laminate is fitted as a floating floor, which means the joined planks rest on the base rather than being nailed or glued to it.

The wood-fibre core in most laminate can swell if water reaches it. A water-resistant surface does not automatically mean the joints, cut edges, and underside can withstand standing water. Check where the product can be used before buying, especially for a ground-floor room, laundry area, or kitchen.
For kitchen flooring, look for clear instructions covering spills, sealing around the room’s edges, and appliance areas. Do not use ordinary laminate in a wet room or shower area unless the complete flooring system is expressly approved for that use.
In Dubai, air conditioning matters as much as outdoor heat. Keep the room close to the conditions you expect when using it, both before and during fitting. Avoid laying planks in a hot, closed apartment and cooling it sharply afterwards. Do not install over an active leak, damp screed, or a base that is still drying.
Before choosing a product, compare its fitting guide with the room’s needs. Floor World Dubai provides information on laminate flooring, while this comparison of laminate vs vinyl flooring in Dubai explains the practical differences if moisture is a concern.
A standard straight-plank fitting method does not apply to every pattern. Some herringbone flooring systems use separate left-hand and right-hand boards, so they need their own starting layout and fitting sequence.
Measure the Room and Plan the Rows Before Buying
Measure every part of the floor, then plan the first and last rows before opening the packs. A little layout work prevents narrow strips at the far wall and awkward joints in doorways.

Measure rectangular areas by multiplying length by width, then add alcoves and door recesses separately. For example, a room measuring 4 metres by 5 metres has a floor area of 20 square metres. Adding a 10 percent cutting allowance as an example gives 22 square metres, which you must then round up to whole packs.
A simple rectangular room often needs less spare material than a room with many corners. Diagonal layouts and patterned floors create more waste, so use the supplier’s allowance for the chosen layout rather than treating 10 percent as a fixed rule.
Buy the required quantity together where possible, check the batch details, and keep a few matching boards for future repairs. For a first DIY job, allow a weekend for a straightforward room once the base is ready. Drying, floor repairs, and allowing the planks to adjust to the room can take longer than laying the boards.
Gather the Tools and Materials
Use tools that suit the plank’s locking system, because the wrong tapping block or fitting method can damage an edge before the floor is even used.
| Tool or Material | What It Is For | What to Check |
|---|---|---|
| Tape measure, pencil, and square | Measuring and marking cuts | Measure from the correct face and edge |
| Long straightedge and feeler gauge | Finding high and low spots | Use the span stated in the fitting guide |
| Suitable moisture test equipment | Checking the base before covering it | The test method must suit the base |
| Approved underlay | Supporting the joints and reducing sound | Check whether padding is already attached |
| Vapour-control layer, if required | Limiting moisture movement from the base | Follow the flooring system’s instructions |
| Spacers | Holding the expansion gap open | Use the specified gap size |
| Laminate cutter, jigsaw, or suitable saw | Cutting planks to size | Support the board and use a suitable blade |
| Approved tapping block and pull bar | Closing joints where permitted | Never strike a click edge directly |
| Undercut saw or oscillating tool | Trimming door casings | Check cutting depth and hidden fixings |
| Eye, hearing, knee, and dust protection | Reducing injury and dust exposure | Use dust extraction where possible |
Work Out the First and Last Row Widths
Calculate the usable room width after subtracting the expansion gaps, then divide it by the plank width. The remainder shows how wide the final row would be if you started with a full-width board.
For example, suppose a room is 3,120 mm wide and the chosen product requires a 10 mm gap at each side. That leaves 3,100 mm for flooring. With 190 mm planks, 16 full rows would leave a final strip only 60 mm wide.
A better layout may be a 125 mm first row, 15 full rows, and a 125 mm last row. Check those widths against the manufacturer’s minimum, and remember that an uneven wall may make part of a row narrower.
Measure across the room in several places rather than trusting one reading. If the walls are not parallel, plan for the narrowest point and mark a straight reference line. Running boards along the longest wall often looks tidy, but the doorway position, room shape, and product instructions should guide your final choice.
Make the Subfloor Dry, Flat, and Firm
The subfloor, which is the base beneath the laminate, must be dry, flat, clean, and stable. Underlay cannot make up for a soft base, loose tiles, or deep dips because the click joints will still bend as people walk across them.

Flat does not mean perfectly level. A floor can slope gently and still support laminate well, while a level floor with a sharp ridge can damage the joints. Follow the product’s installation guide for how flat the base must be and the length of straightedge to use.
For example, if the guide allows no more than a 3 mm gap beneath a 2 metre straightedge, check across the room in several directions using that exact method. Do not apply that example to a product with a different limit.
- Remove carpet, carpet underlay, gripper rods, staples, and loose debris. Soft floor coverings are not a firm base for click-lock laminate.
- Check the exposed base for cracks, movement, hollow tiles, raised seams, and water damage. Fix the cause rather than covering it.
- Secure loose timber boards and repair damaged sections. Check for pipes and cables before adding screws.
- Correct high and low spots with a method approved for the base. Use a suitable smoothing compound where needed, following its primer and drying instructions.
- Vacuum thoroughly, including around walls and doorways, so grit cannot sit beneath the underlay.
- Test moisture using the method required by the laminate supplier, then record the results before covering the base.
A new concrete or screed flooring base can look dry while still holding moisture below the surface. Handheld surface meters may help find areas that need checking, but they do not replace a required test, such as an in-slab humidity test. There is no single moisture reading that is safe for every flooring system.
| Existing Base | Can Laminate Go Over It? | What Must Be Checked First |
|---|---|---|
| Concrete or screed | Often, once approved conditions are met | Moisture, flatness, cracks, and the required vapour-control layer |
| Ceramic or stone tile | Often, if tiles are firmly bonded | Loose tiles, raised edges, deep grout lines, and added floor height |
| Timber boards or plywood | Often, if dry and sound | Movement, squeaks, damaged panels, and ventilation below |
| Existing floating flooring | Usually remove it unless expressly approved | Movement between layers and unsupported joints |
| Carpet or cushioned flooring | Remove unless the laminate maker expressly permits the surface | Softness and movement can strain the locking edges |
Stop work if an older floor covering or adhesive might contain asbestos. Do not sand, grind, or disturb suspect material until it has been assessed safely.
If moisture is an ongoing room condition rather than a fault you can repair, choosing a different floor covering may be wiser than trying to make laminate work. Compare approved vinyl flooring options, but remember that a water-resistant covering does not fix a damp building or remove subfloor moisture limits.
Condition the Planks and Fit the Correct Underlay
Allow laminate to adjust to the room as directed, then fit only the underlay and moisture-control layers approved for that product. Extra cushioning can feel comfortable at first but may let the boards flex enough to weaken their joints.

Acclimation means allowing the planks to adjust to the room before fitting. Follow the pack instructions for storage position, packaging, time, temperature, and humidity. Many manufacturer fitting guides specify a period of around 48 hours, but some products have different requirements, so follow the guide for your flooring.
Store packs flat and keep them away from damp walls, heaters, and strong direct sun. Maintain normal indoor conditions during fitting and afterwards. An empty Dubai apartment with the cooling switched off may not provide the conditions the product requires.
Underlay and a vapour-control layer have different jobs. Underlay supports the floor and helps reduce sound, while a vapour-control layer limits moisture moving upward from the base. Some products combine both functions, but others do not.
- If the laminate has attached padding, do not add another underlay unless the manufacturer allows it.
- On a concrete base, fit the specified vapour-control system and seal joints as directed.
- On a timber base, do not add a sheet that blocks moisture without checking the floor construction, because moisture can become trapped.
- Butt underlay edges together without overlap unless the product has a purpose-made overlap flap.
- Keep grit out of the joints and lay only as much underlay as you can protect while working.
Check the total floor height before going further. Laminate plus underlay can prevent a door from opening, leave an awkward height difference at a threshold, or trap a dishwasher beneath the worktop.
If your apartment building has rules about sound, confirm that the complete floor and underlay system meets them. A sound-reduction figure printed on an underlay pack does not necessarily describe how it will perform in your building.
Install the Laminate Planks Row by Row
Start from a straight reference line, hold the required expansion gap with spacers, and use the joining method shown for your exact click system. The first few rows set the line for the whole floor, so correct any curve or open joint before continuing.
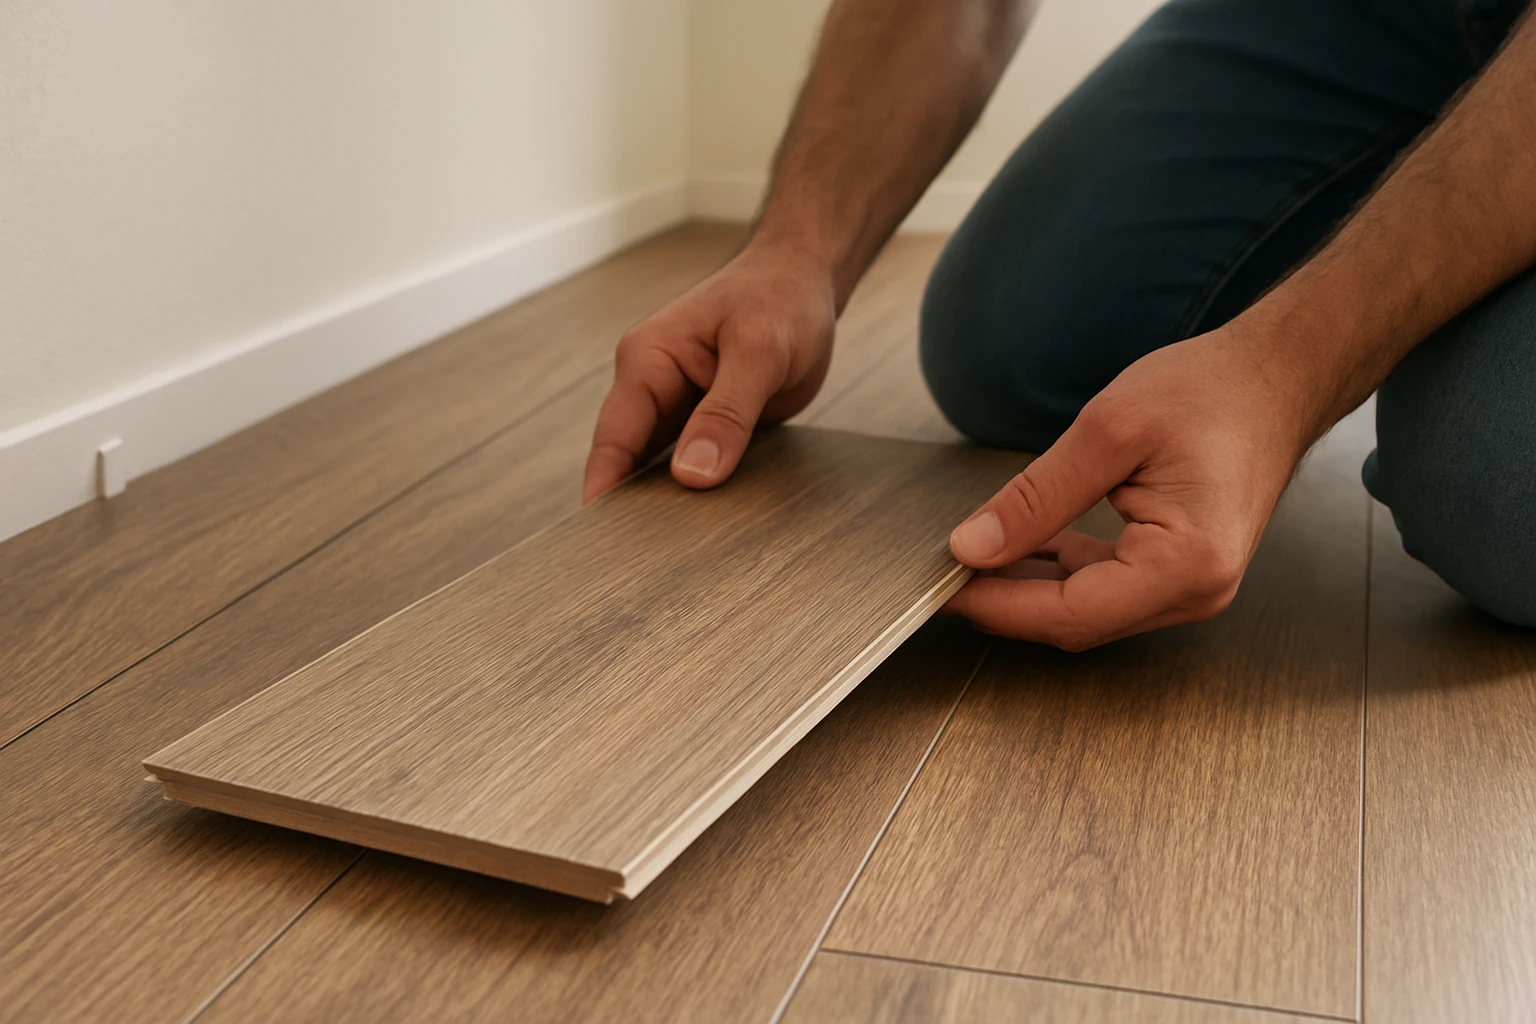
Read the fitting sequence before starting, because angle-angle, fold-down, and other click joints do not all close the same way. Some boards join one at a time, while others require you to assemble a complete row before angling it into place.
- Check and mix the boards. Inspect each plank under good light and set aside damaged pieces. Work from several packs where the product allows it, spreading repeated grain patterns across the room rather than placing matching boards side by side.
- Cut the first row if the layout requires it. Remove the wall-facing tongue or trim the row width only as directed. If the wall curves, scribe the boards by marking the wall’s shape onto each plank before cutting it. Keep the required expansion gap.
- Position the first row against spacers. Keep the correct joint edge facing the room and check the row against your reference line. Use spacers at ends, corners, and other points where the row could shift.
- Join the first-row end joints. Fit each board using the approved method and measure the final piece, allowing for the required wall gap. Keep the correct locking end on the part you will install.
- Start the next row with a suitable length. Use the previous row’s offcut only if it meets the minimum board length and joint-offset rules. Stagger end joints so that neighbouring rows do not form a weak line across the floor.
- Engage each joint fully. Support the plank at the stated angle, align the edges, and lower or lock it as instructed. If a tapping block is permitted, use the correct block and light taps rather than striking the plank edge itself.
- Check every few rows. Look for open seams, raised corners, trapped debris, and rows drifting away from the reference line. Correct problems while the boards are still easy to reach.
- Measure and cut the final row. Take readings at several points because the wall may not be straight. Allow for the expansion gap, cut the boards to suit, and use a pull bar only where the fitting guide permits it.
Manufacturer installation guides often specify end-joint offsets of around 300 mm, but the minimum varies by product. Follow the stated distance and avoid a repeated staircase pattern or alternating H-shaped joints where the guide prohibits them.
The same care applies to expansion gaps. Many laminate fitting guides use gaps of around 8 to 12 mm for ordinary rooms, but room size, climate, and product design can change the requirement. Check the maximum floor dimensions allowed without a break and the rules for breaks at doorways, rather than assuming one gap size works everywhere.
For saw cuts, use the blade and cutting direction recommended for that tool to limit chipping, and test on an offcut first. Support the board on a stable surface, keep hands clear, and never cut a loose plank resting on your lap or on the newly laid floor.
A joint that refuses to close is a reason to stop, not hit harder. Check for a damaged edge, dust inside the groove, the wrong angle, or a row that has moved out of line. Too much force can crush the locking edge while leaving the top looking almost normal.
Fit Doorways, Pipes, and Trims Without Trapping the Floor
Fit laminate neatly around fixed objects while keeping the required movement space hidden beneath trims or covers. The floor must remain free to expand, so do not pin it down with screws, tight door frames, cabinets, or hard filler.

Cut Door Casings and Check Door Clearance
Where the frame material and door assembly allow it, undercut the casing using a laminate offcut and the correct underlay as a height guide. The plank should slide beneath the casing without being clamped tightly, and its hidden edge must still have the required gap from the wall or frame behind it.
Check how the joint will close before making the cut. A board that must slide sideways beneath a casing may need a manufacturer-approved fitting method rather than the normal angled action. Do not shave off locking edges or glue a joint unless the guide specifically describes that method.
Do not alter a fire-rated door, frame, or seal without approval from a qualified person. If the finished floor reduces door clearance, resolve that issue before laying the whole room.
Leave Space Around Pipes and Fixed Units
Drill pipe openings large enough to preserve the specified expansion space all around the pipe. Use a suitable pipe cover to hide the opening, and make sure any small piece fitted around the pipe does not bond the floating floor to the pipe or base.
Install fixed kitchen cabinets and islands according to the flooring manufacturer’s rules, which commonly require the floating floor to stop around them. Heavy fixed units can trap the boards and cause lifting elsewhere as conditions change.
Freestanding furniture is a different case, but large loads still need care. Do not assume that approval for a dining table also covers a fixed island, large aquarium, or heavy built-in unit.
Fit Thresholds and Skirting Correctly
Use doorway profiles where the manufacturer requires a break between rooms or where two floor types meet. Choose the profile for the actual height difference, and fasten its base to the subfloor without fixing through the floating planks.
Remove temporary spacers once fitting is complete. Attach skirting to the wall, or fix suitable edge trim to the skirting, without pressing it down so tightly that the floor cannot move.
Do not pack expansion gaps with rigid grout or ordinary filler. Where a water-resistant laminate system requires sealing around the room’s edges, use the specified compressible backing and flexible sealant, fitted as directed, rather than improvising.
If the room needs a different product because of repeated spills or how the space is used, SPC flooring may be worth comparing. The guide to SPC flooring for homes explains its uses, but SPC still needs proper base preparation and room for movement.
Check the Finished Floor Before Moving Furniture Back
Check the joints, edges, doors, and thresholds before putting the room back into use. A small fitting fault is easier to correct now than after furniture hides it or foot traffic damages the joint.
Walk across the floor in clean, soft-soled shoes and listen for repeated clicks or grinding. A floating floor may have slight movement, but a board that visibly bends, rocks, or catches at its edge needs checking.
| What You Notice | What May Be Wrong | What to Check Before Continuing |
|---|---|---|
| Open end joint | Joint not fully engaged, damaged lock, or debris | Inspect and refit rather than forcing the gap shut |
| Raised corner | Fold-down joint not seated or locking edge damaged | Follow the approved release and refitting method |
| Springy patch | Low spot, soft base, or unsuitable underlay | Check the base instead of adding more padding |
| Ridge or lifted area | Floor trapped at an edge, missing gap, or moisture | Find the cause rather than weighing the area down |
| Gritty sound | Debris beneath the floor or inside a joint | Lift and clean the affected area where possible |
| Door scraping | Finished floor is higher than expected | Check the door’s permitted adjustment method |
Many dry click-lock floors can be used soon after fitting, but any approved adhesive or sealant may need time to cure. Follow those instructions before moving appliances, cleaning, or exposing sealed areas to water.
Lift furniture rather than dragging it, fit suitable pads beneath furniture feet, and use protection when moving heavy appliances. Clean with the laminate maker’s recommended method and a lightly damp mop, not a soaked one. Avoid steam cleaning unless the product expressly allows it.
Keep the spare boards, product label, fitting guide, moisture-test record, and any installation photos together. If a joint later opens or an appliance leaks, those details make it much easier to choose the right repair instead of guessing.
Frequently Asked Questions
Can Laminate Flooring Be Installed Over Underfloor Heating?
Laminate can be installed over underfloor heating only when both systems are approved for use together. Check the floor temperature limit and the combined heat resistance of the laminate and underlay. Follow the required heating start-up process, and avoid sudden temperature changes or thick rugs that can trap heat.
Can I Use Laminate Flooring on Stairs?
Laminate can be fitted on stairs only with a stair-approved method and suitable nosing, rather than as a normal floating floor. Each tread needs secure support, and the front edge must be safe under foot traffic. Check local stair requirements and the product instructions, as ordinary room-fitting details do not apply.
Can One Damaged Laminate Plank Be Replaced?
A damaged laminate plank can often be replaced, but the method depends on its location and locking system. Boards near a wall may be reached by carefully lifting nearby rows, while a central board may need a specialist repair. Keep matching spare planks because a later purchase may differ in colour or joint design.
Do I Need Permission to Install Laminate in a Rented Dubai Apartment?
Check your tenancy terms and obtain any required landlord or building approval before installing laminate in a rented Dubai apartment. A floating floor is not automatically exempt from approval, especially if the work changes doors, skirting, or sound performance. Ask about acoustic rules, work hours, and reinstatement requirements before buying materials.
Can an Office Chair Damage a Laminate Floor?
A rolling office chair can damage laminate if grit, hard wheels, or repeated movement wears the surface or strains the joints. Use chair wheels approved for hard floors and a protective mat compatible with the laminate. Keep the area clean, and check the product’s chair-use guidance before setting up a permanent workspace.


